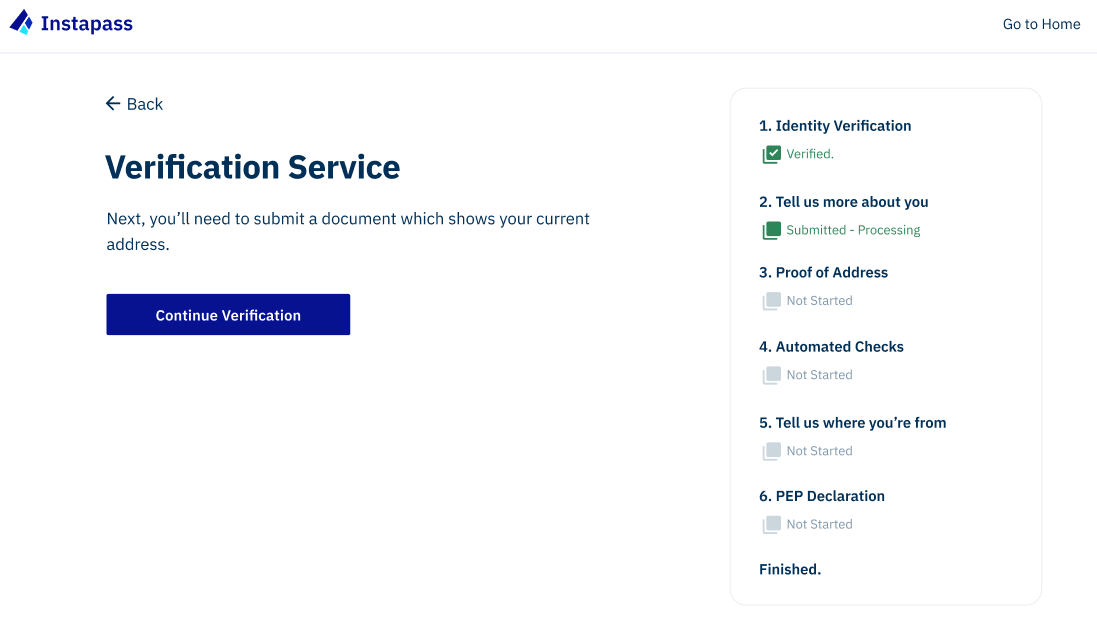
Before you are able to use Instabridge, you will first need to complete KYC through Instapass. You can see all of the guides on how to create your Instapass Identity here.
Step 1: First, you will be asked to verify your identity, please see the guide on how to do this here. After verifying your identity click “Continue Verification” to continue the verification process.

Select the device you wish to complete the address verification checks on.

Step 2: Please upload a proof of address document from the approved list. Your proof of address document must show your residential address, your name and be dated within the last 120 days. Note that we cannot accept a PO box as a valid proof of address.
Depending on country, the following documents are acceptable as proof of address:
- Utility bill (gas, water, electric, internet) from a reputable company
- Bank statement from a regulated bank
- Credit card statement from a regulated bank
- Tax return (from the government, only if address is pre-printed on the return. Correspondence from IRS or HMRC also acceptable)
- Council bill
- Landline phone bill
- Social security card, dependent on country of residence
Please note your proof of address document must be dated within the last 120 days.
Please make sure of the following:
- The image is well-lit and legible
- The file must be recent, in colour and in JPG, JPEG, PDF or PNG format
- The file is no larger than 10MB
- There is no glare on the image
- The image is in focus
- Nothing is covering the document
- You have not manipulated the image in any way (this includes cropping or editing the image)

Step 3: Once you have uploaded your documents, SumSub will try to automatically extract the residential address from the document to verify your identity. This may take up to 48 hours. Click “Continue Verification” to proceed.

Step 4: You will need to select your country of residence and nationality from a dropdown list, then click “continue”.

Step 5: Next you will be asked to confirm whether or not you or any immediate family members or close associates are Politically Exposed Persons (PEPs).
Depending on your answer you may be asked for some additional information.
Step 6: You will receive an email from no-reply@instapass.io to confirm when your verification has been approved. Click “View details” to see the status of your verification in Instapass. If anything more is required of you, support@instapass.io will email you to let you know.

If a problem is flagged with your proof of address document:

Please check the following before trying again:
- You have uploaded the document itself, not a screenshot (digital documents such as PDFs are acceptable)
- Your document is dated within the last 120 days
- Your name and address are clearly visible
- You have not manipulated the image in any way
Step 6: After your information has been verified there are a series of automated checks which are carried out, you do not need to do anything for this part of the process, you will be notified when the checks have been completed. You will receive an email from no-reply@instapass.io to notify you when your verification has been completed.

Once your KYC is verified you can add your wallet addresses and apply for an AML tier so you can use Instabridge.
If you need any help please don’t hesitate to contact support@instapass.io.


